What is the user group?
In the courses on UTOL, you can create units called “user groups” from among the students taking the course. These are used to make course contents (such as course materials and assignments) available only to certain students, allowing you to choose to make the contents available only to certain user groups.
If you frequently restrict access to contents to certain students, you can avoid the trouble of specifying which students can access them each time by registering user groups in advance. One possible case of use is when you want to divide the students into several groups and make different contents available for each group in a group work project.
Notes for using the user group function
- Only the course designer or instructor can manage user groups (register, change, delete). TAs cannot manage them.
- One student can be registered in multiple user groups.
- When publishing contents, you can select multiple user groups as the target for publication.
Relation to the course group
When you register a course group, a user group with members who are enrolled in each of the grouped courses are automatically registered with the name “(academic year)_(department code)_(timetable code)-group”. This is called the “default user group”. If the enrolled students are changed on UTAS after registration, the changes will be reflected in the list of members of each default user group through system integration.
Managing user groups
This section explains the procedures for managing (registering, changing, and deleting) user groups.
Registering a user group
There are two ways to register a user group.
-
Registration by selecting on the screen
- With this method you can select members on the UTOL screen and register them as a single user group.
- This is suitable for cases where you are registering only one user group or where there are only a few members to register.
-
Registration by uploading an Excel file
- Use this method to register one or more user groups by uploading an Excel file containing information about the user groups and their members.
- This is suitable for registering multiple user groups at once or when electronic data is available on the student’s common IDs or student ID numbers.
Registration by selecting on the screen
-
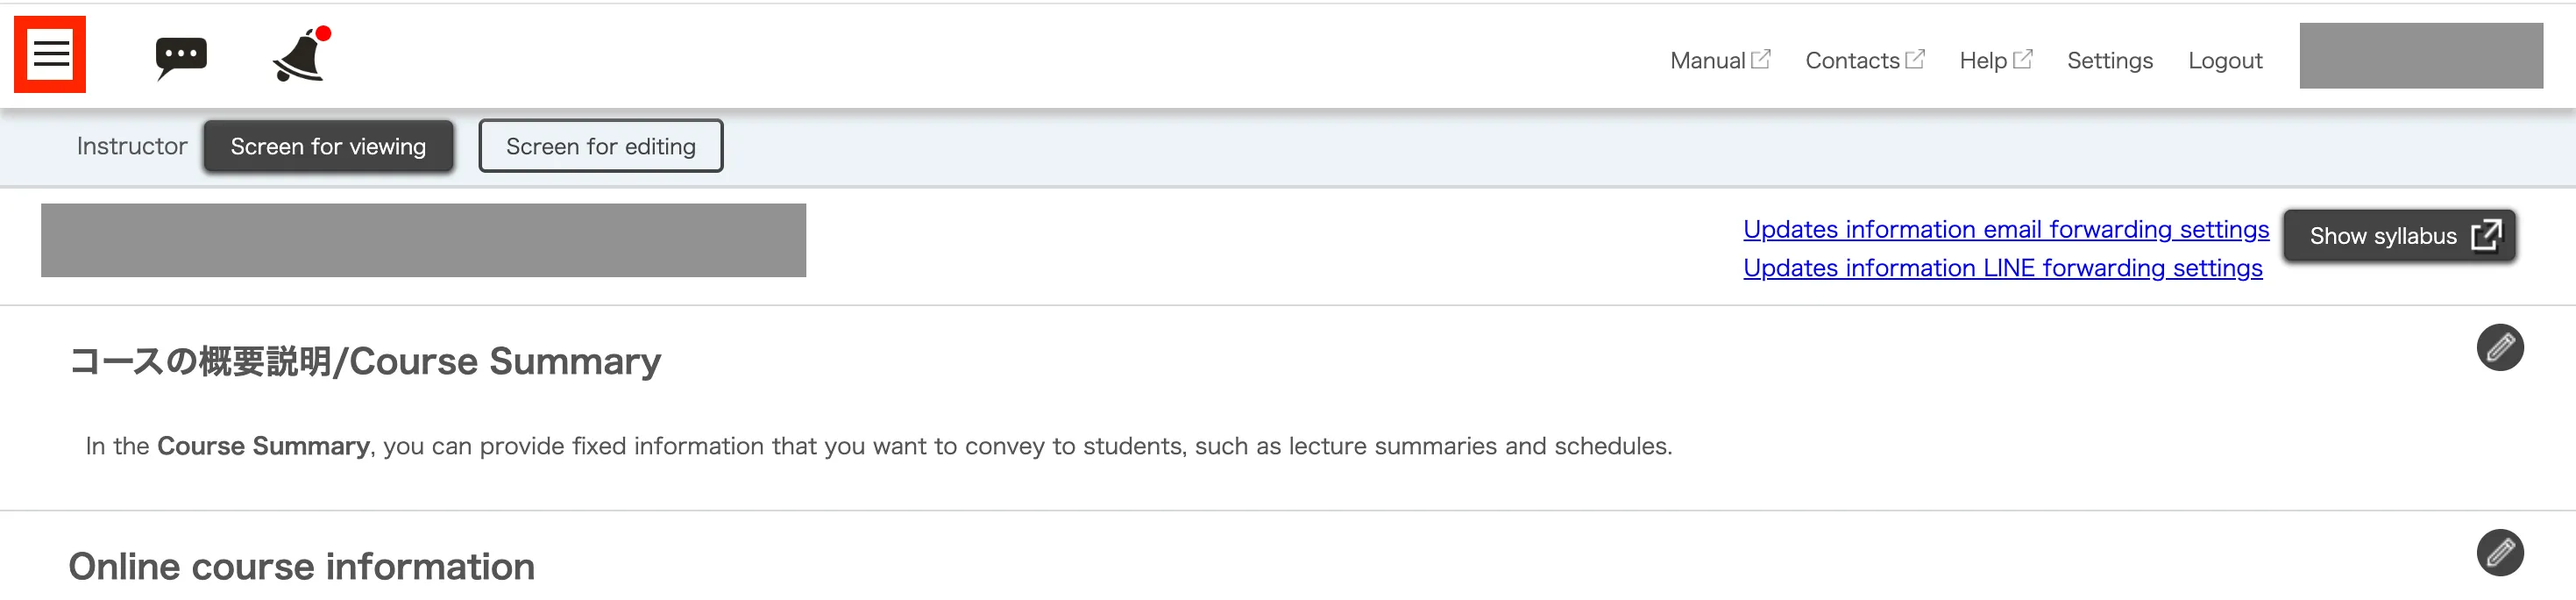
Click on the icon with three lines in the top left corner while the course you want to use is open.
-
Click on “User group settings” under “Course settings”.
If there are no “Course settings”
You may not have the authority required to manage user groups. If you consider it necessary, please consult the course instructor about granting the authority.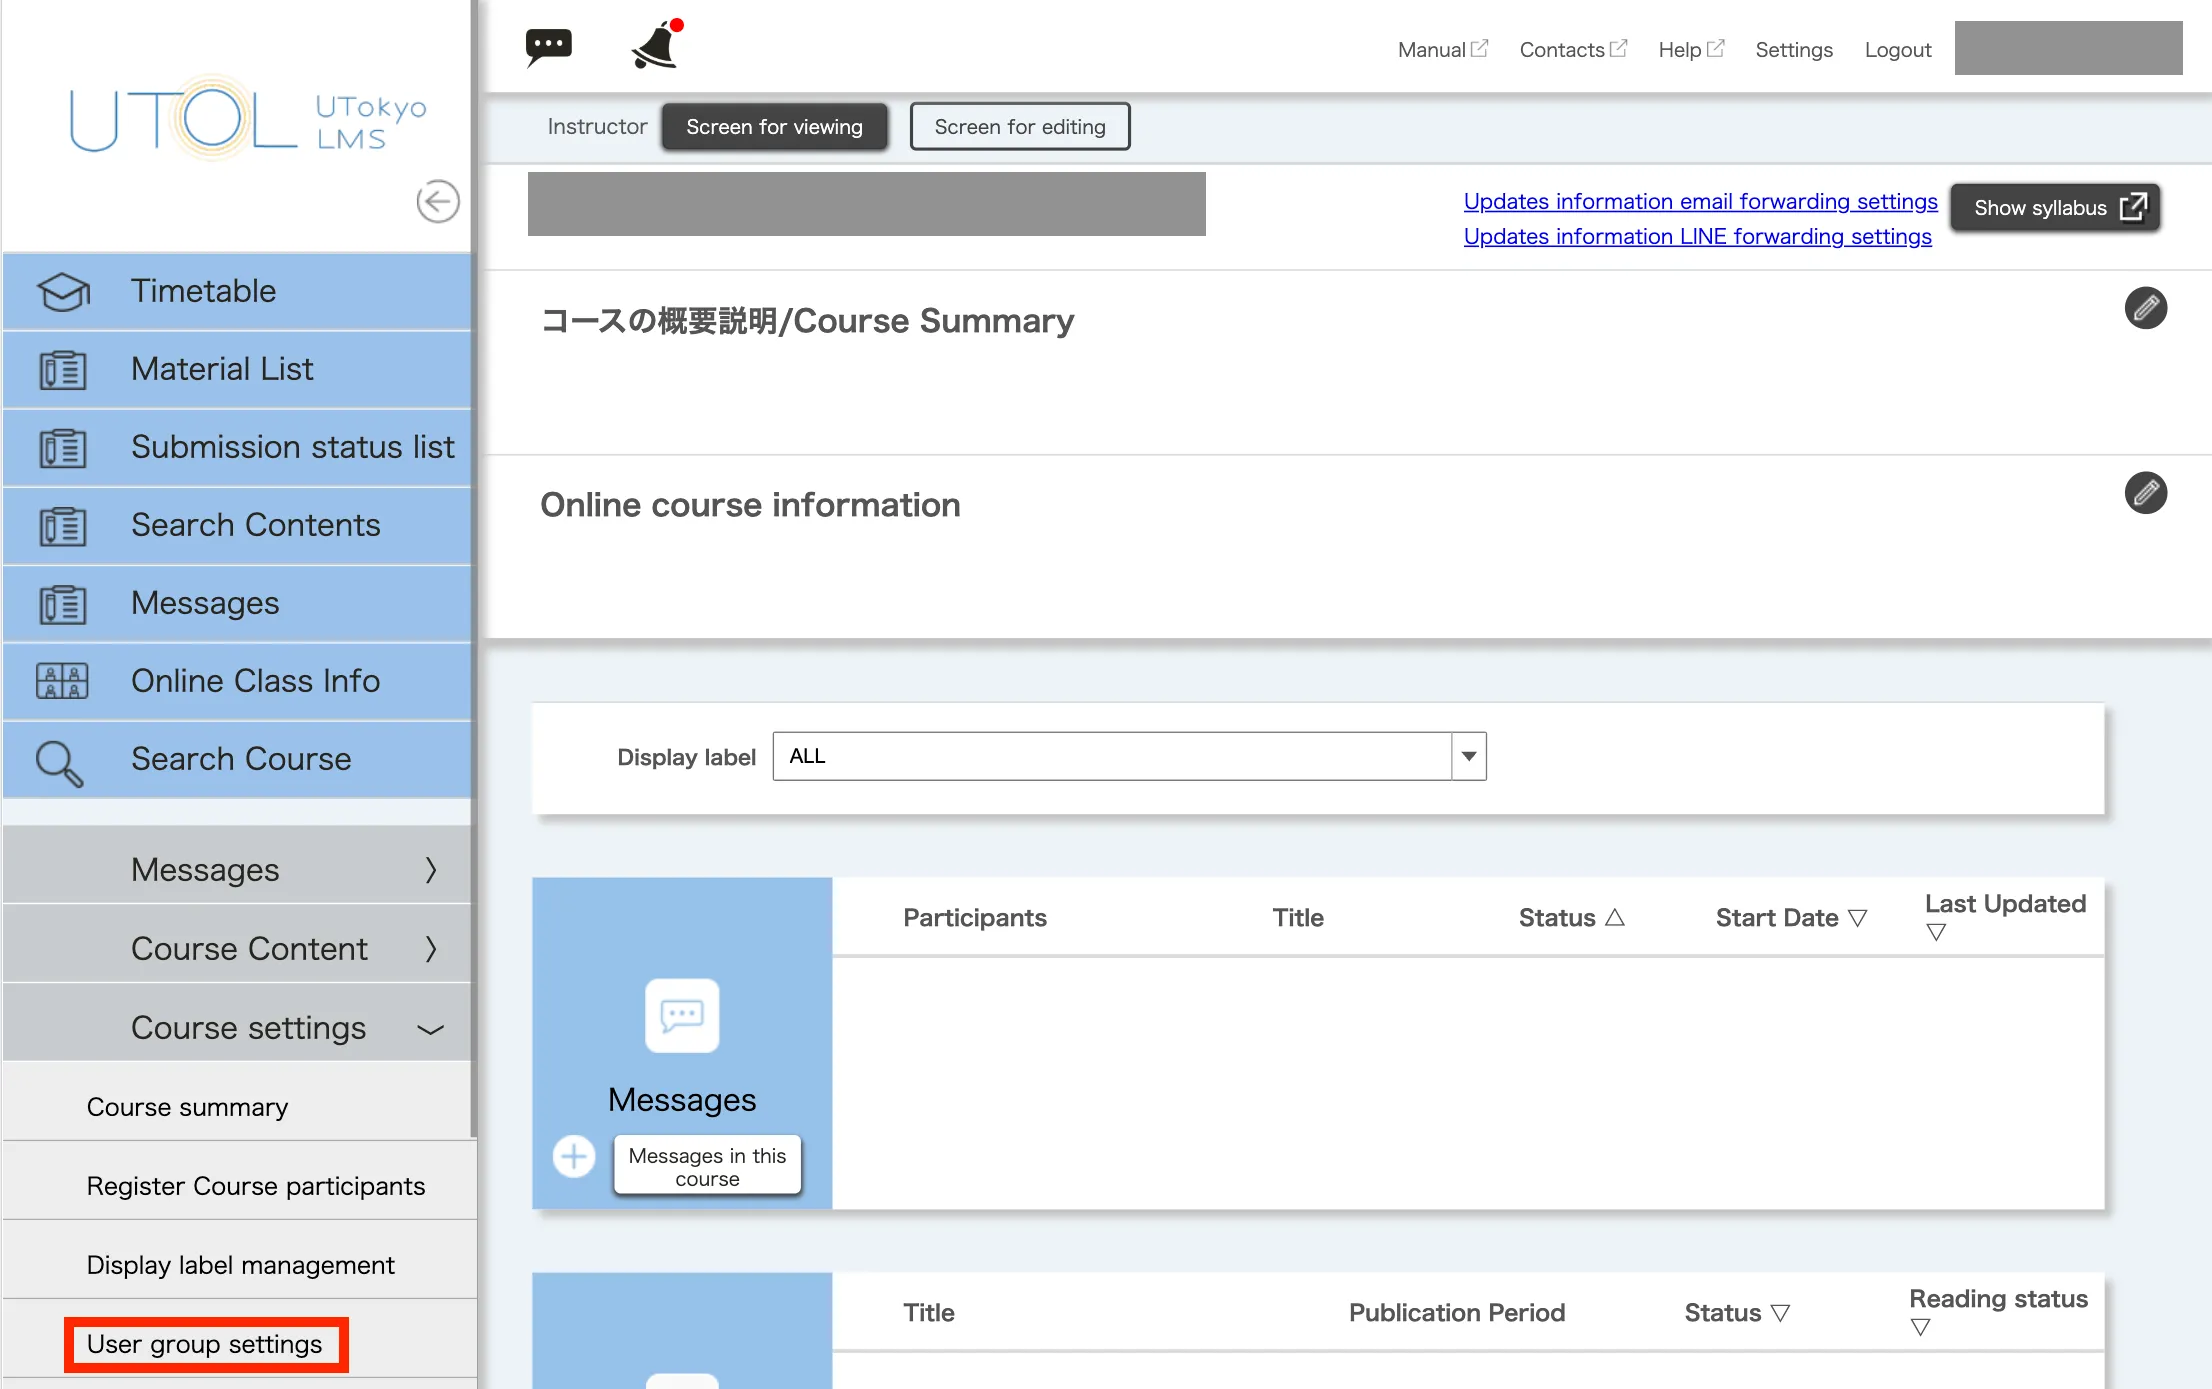
-
Click on the “+” button on the right of “Manage User Group”.

-
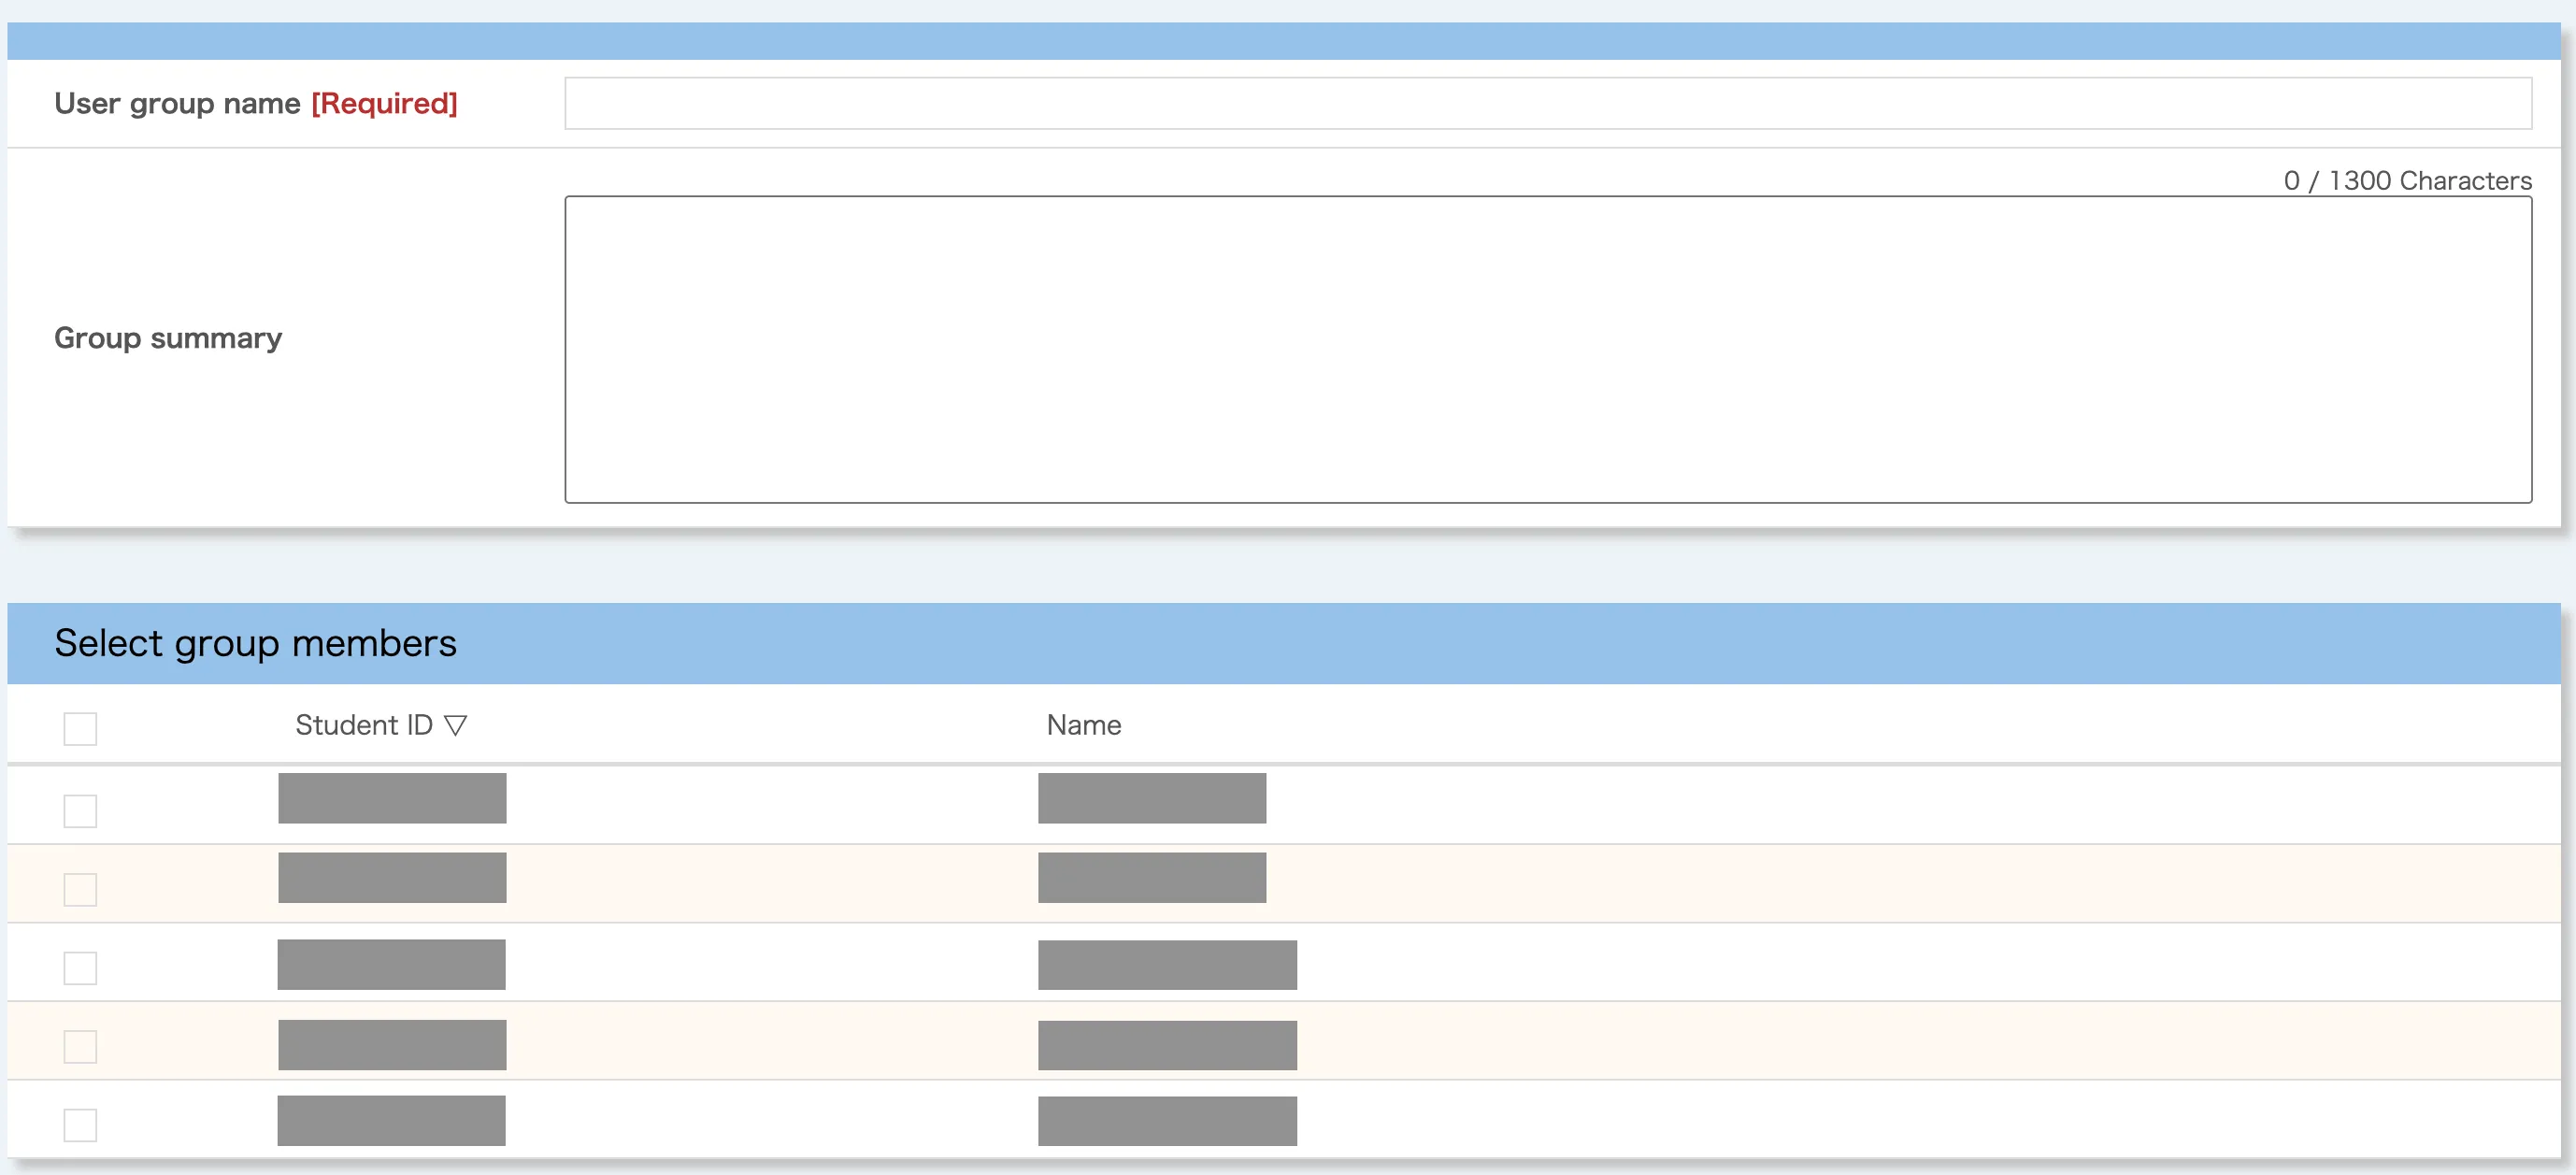
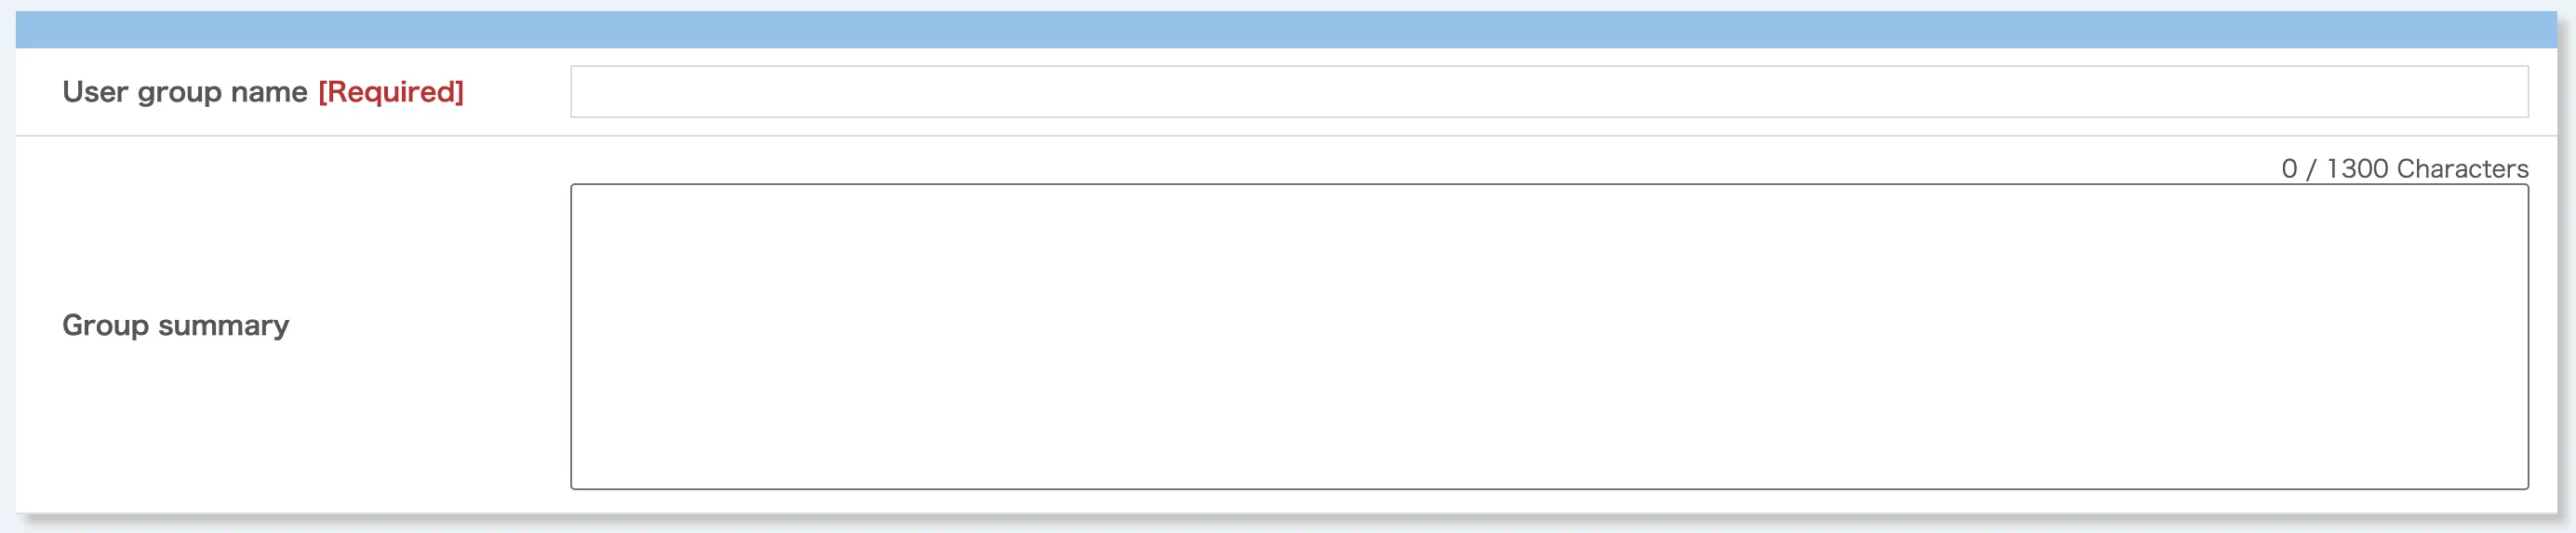
Enter the “User group name” and “Group summary” (optional). This information will be used to distinguish between user groups later.
-
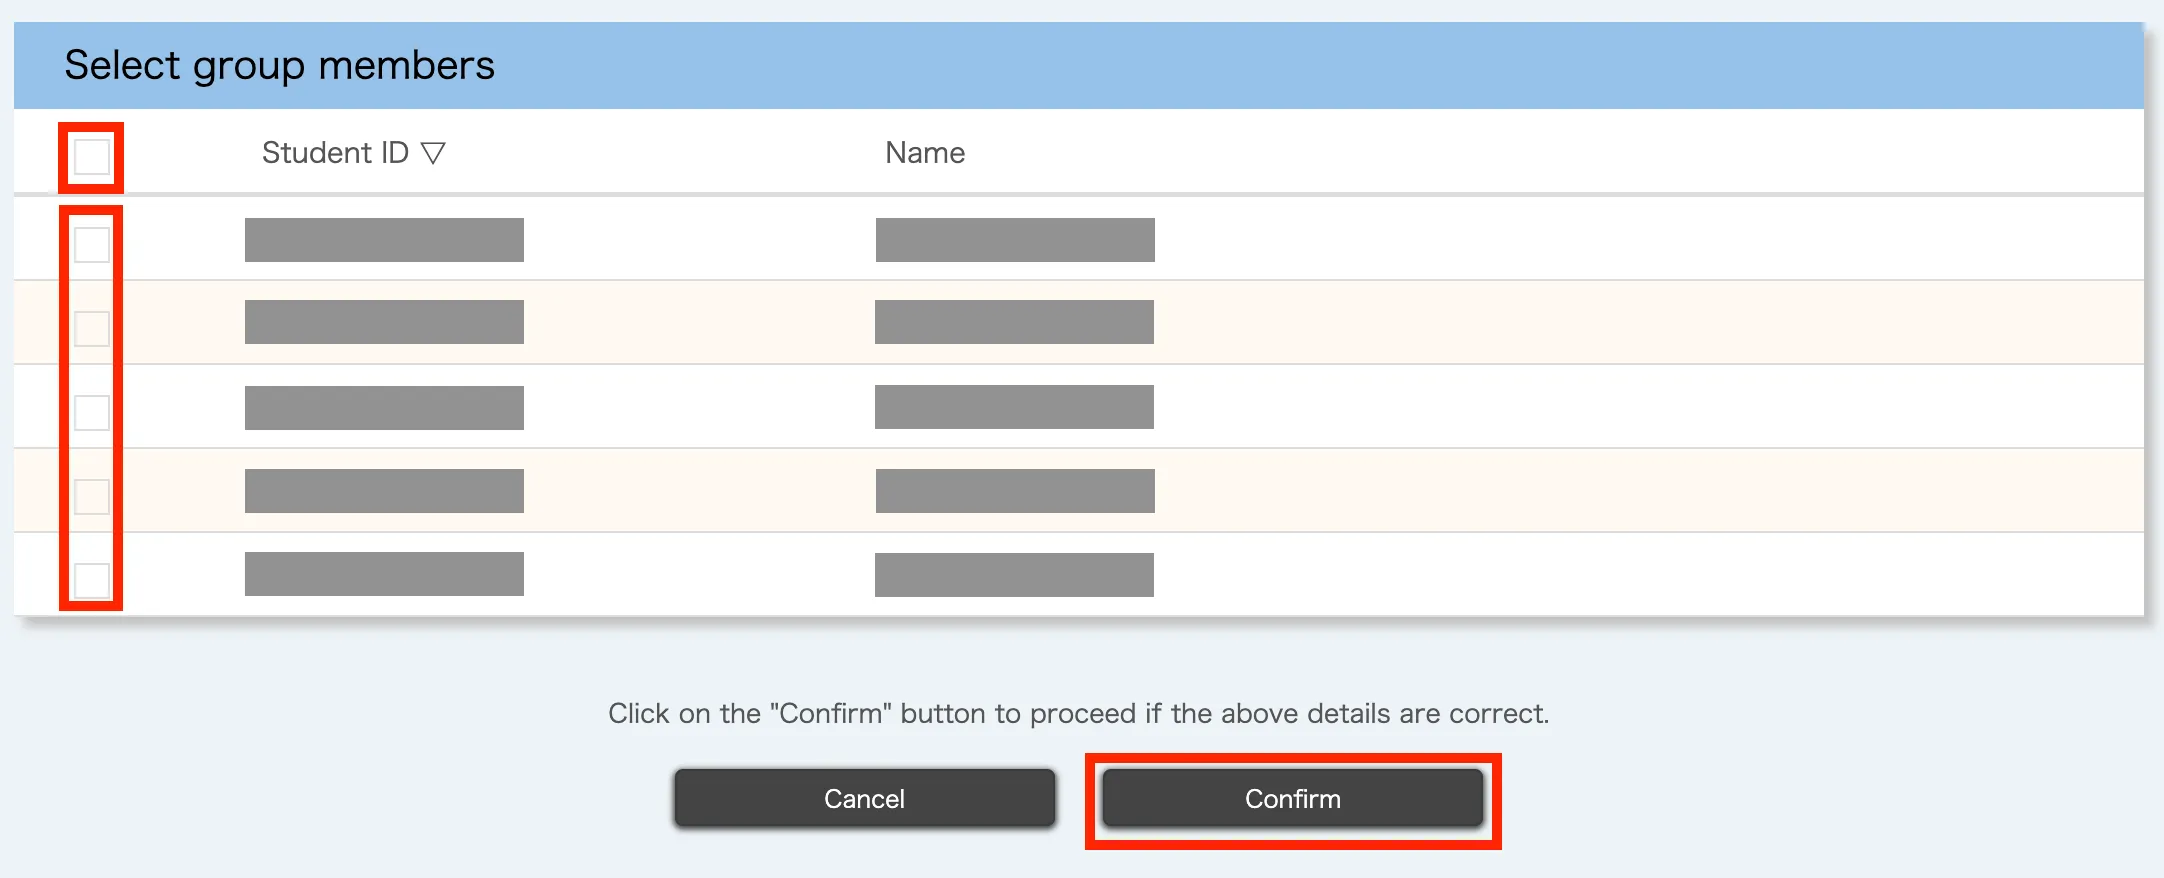
Select all the checkboxes for the users you want to add to the user group and click on the “Confirm” button to proceed. (You can select all the displayed users at once by selecting the checkbox directly “Select group members”.)
-
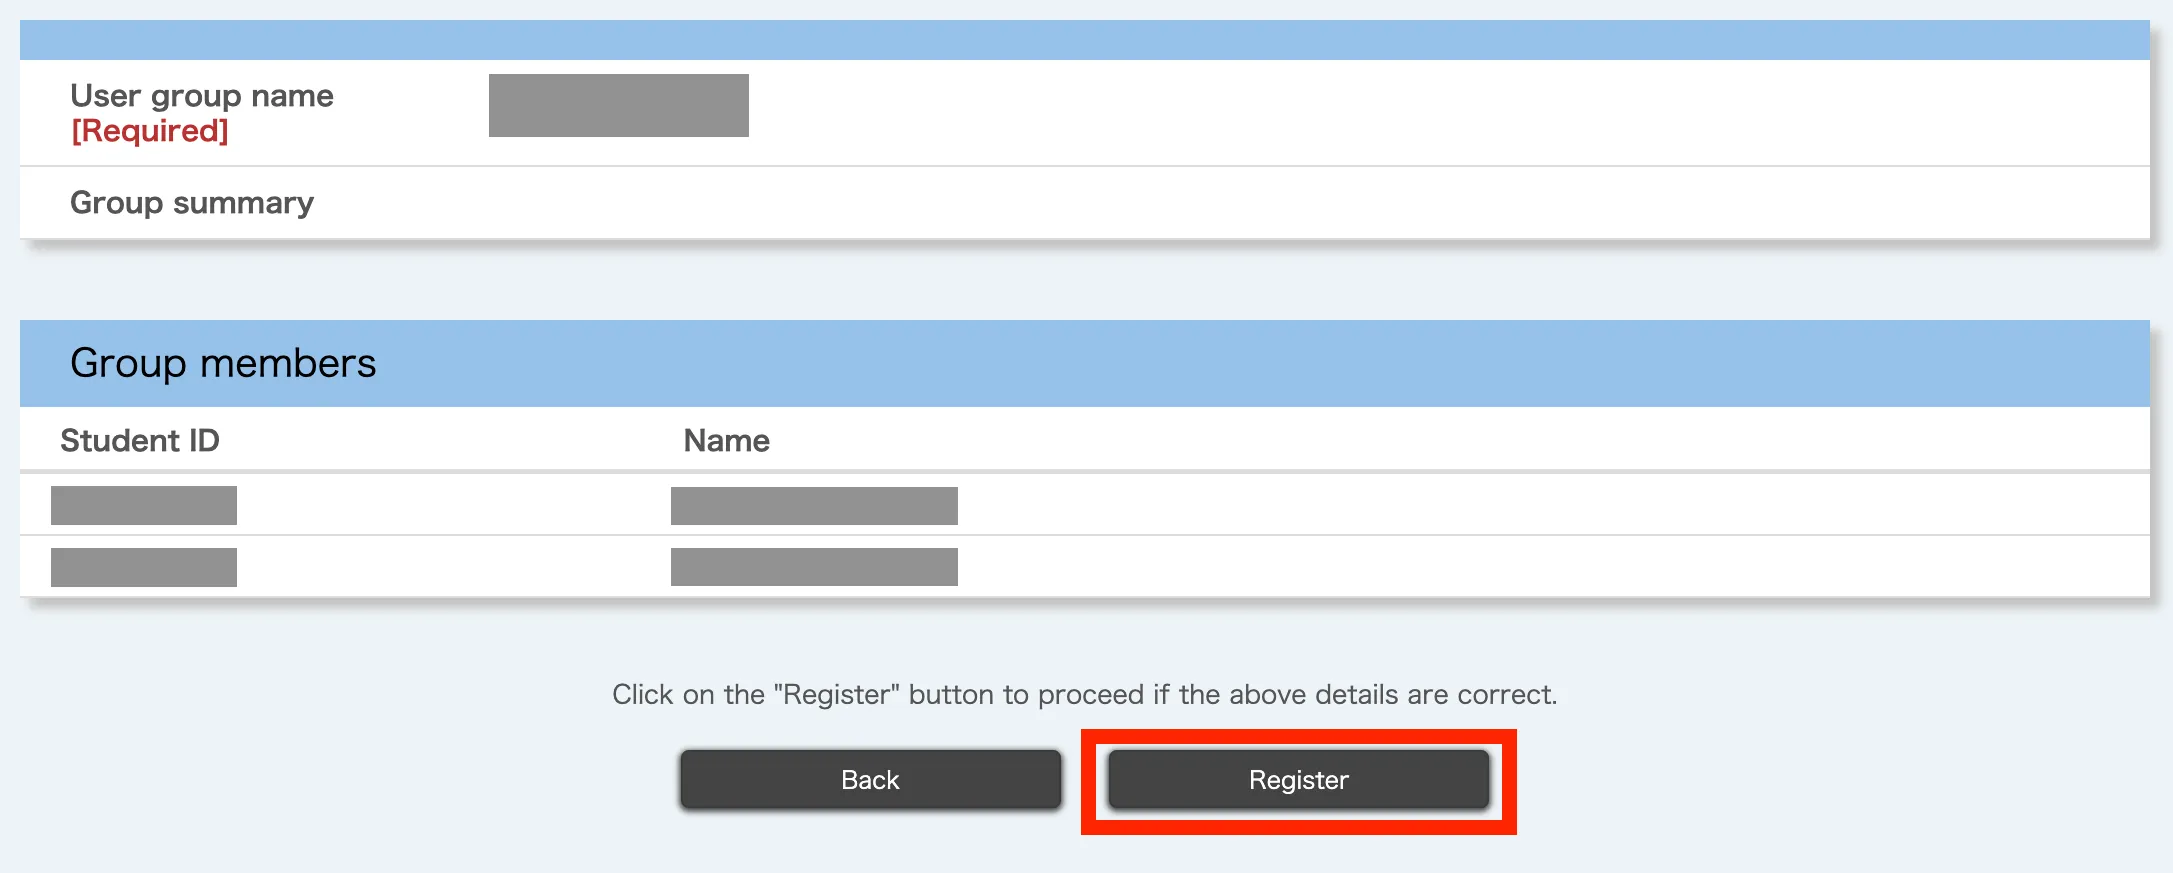
Check the details, and if there are no problems, click on the “Register” button.
-
When the “Registration is completed.” message appears, the registration process has been completed.

Registration by uploading an Excel file
-
Click on the icon with three lines in the top left corner while the course you want to use is open.
-
Click “User group settings” under “Course settings”.
If there are no "Course settings"
You may not have the authority required to manage user groups. If you consider it necessary, please consult the course instructor about granting the authority. -
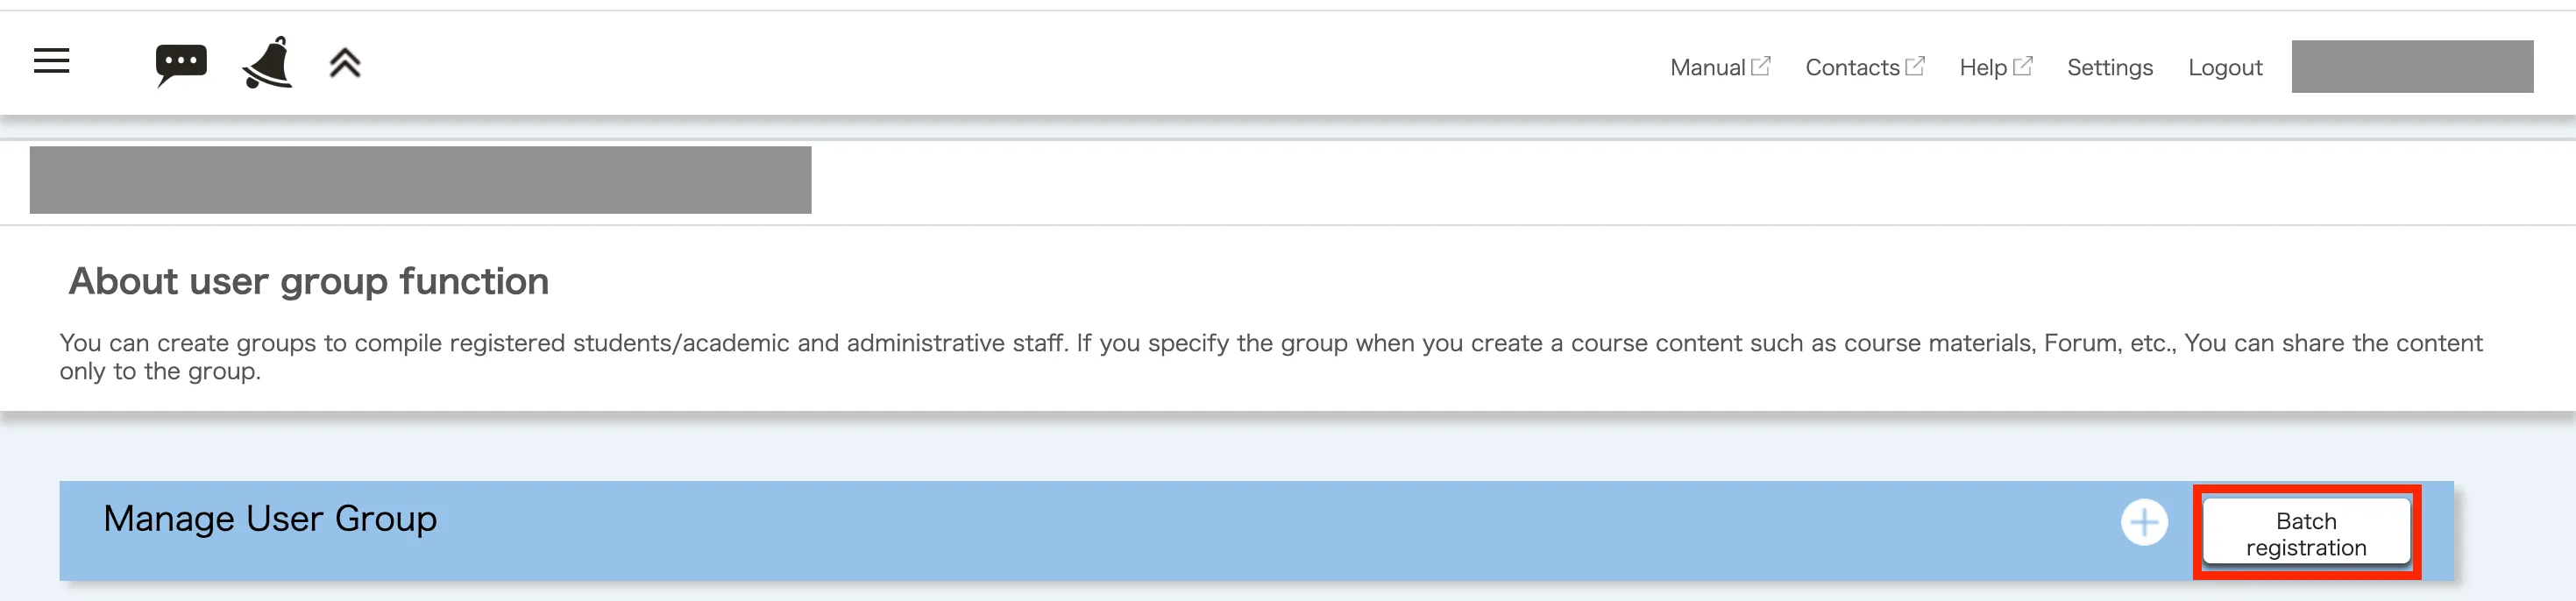
Click on the “Batch registration” button on the right of “Manage User Group”.
-
Click on “Download Format” to download the Excel file for data entry.

-
Open the downloaded Excel file.
-
Please follow the procedure below to enter the information for each user group you wish to register. Note that each user group corresponds to a single row in the Excel file. In other words, you cannot use multiple rows to describe a single user group.
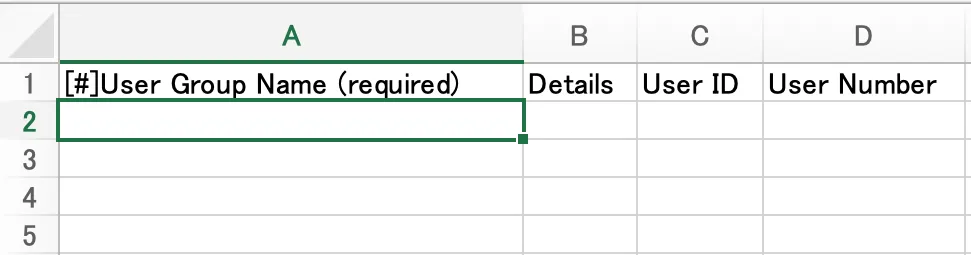
- First, enter the “User Group Name” and “Details” (optional). This information will be used to distinguish between user groups later.
- Next, enter either the common ID or student ID number for all members. If it is a common ID, enter it in the “User ID” field, and if it is a student ID number, enter it in the “User Number” field. Please enter the common ID and student ID number in one field, separated by a semicolon.
The following image is an example of how to enter the information.

-
Once you have finished entering the data, please save it.
-
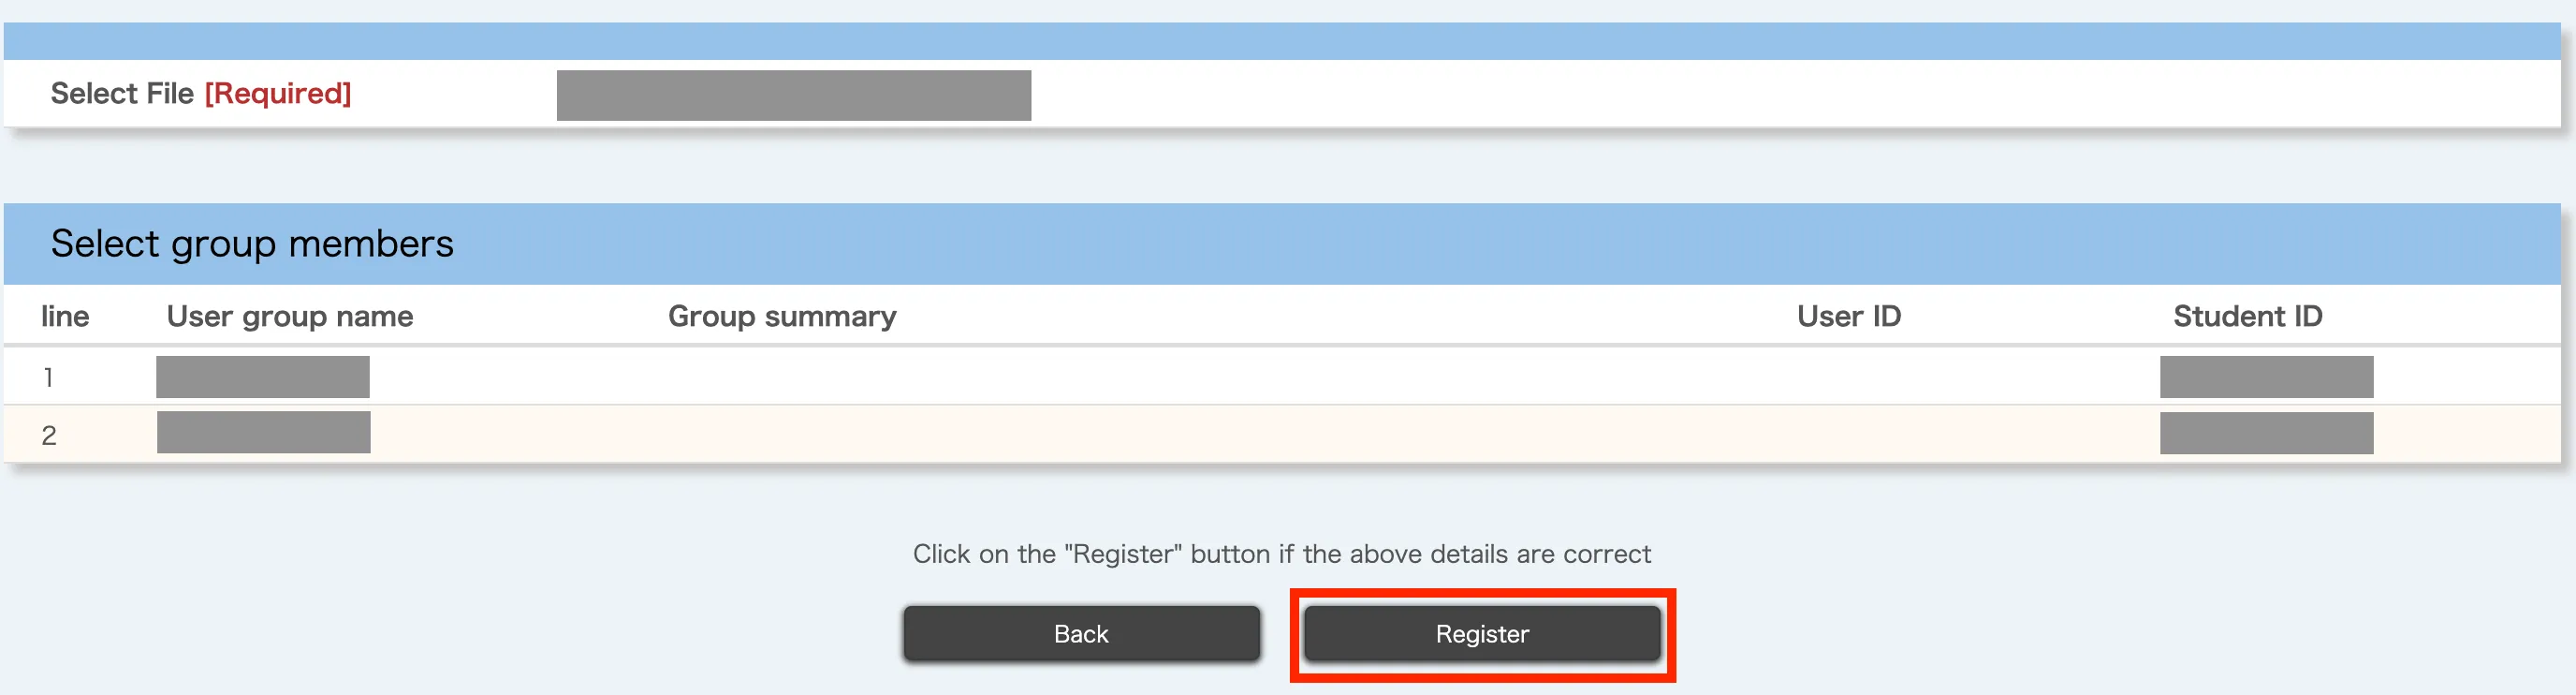
After selecting the Excel file you entered by clicking on the “Reference” button on the UTOL screen, click the “Confirm” button to proceed.

-
Check the details, and if there are no problems, click on the “Register” button.
-
When the “Registration is completed.” message appears, the registration process has been completed.
Changing the user groups
This section explains the procedure for changing registered user groups, such as adding and deleting members.
-
Click on the icon with three lines in the top left corner while the course you want to use is open.
-
Click “User group settings” under “Course settings”.
If there are no "Course settings"
You may not have the authority required to manage user groups. If you consider it necessary, please consult the course instructor about granting the authority. -
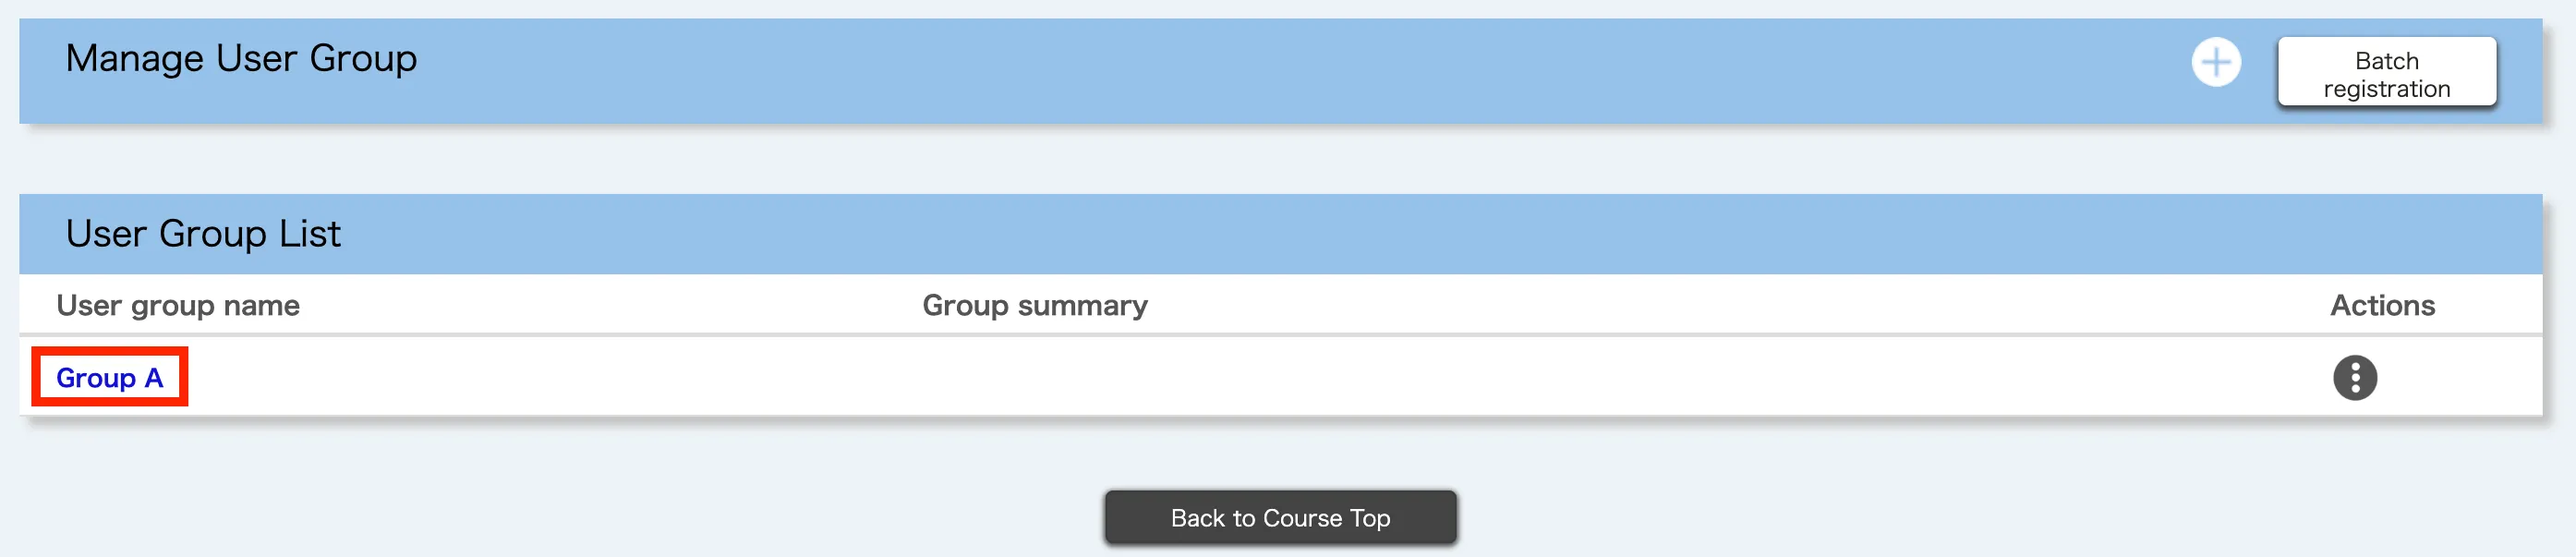
Click on the user group name you want to change in the “User Group List”.
-
The same screen as the one used for registration by selecting on the screen will be displayed. Make any necessary changes to the items you want to change, and then click the “Confirm” button to proceed.
-
Check the details, and if there are no problems, click on the “Register” button.
-
When the “Registration is completed.” message appears, the registration process has been completed.
Deleting user groups
This section explains the procedure for deleting user groups.
-
Click on the icon with three lines in the top left corner while the course you want to use is open.
-
Click “User group settings” under “Course settings”.
If there are no "Course settings"
You may not have the authority required to manage user groups. If you consider it necessary, please consult the course instructor about granting the authority. -
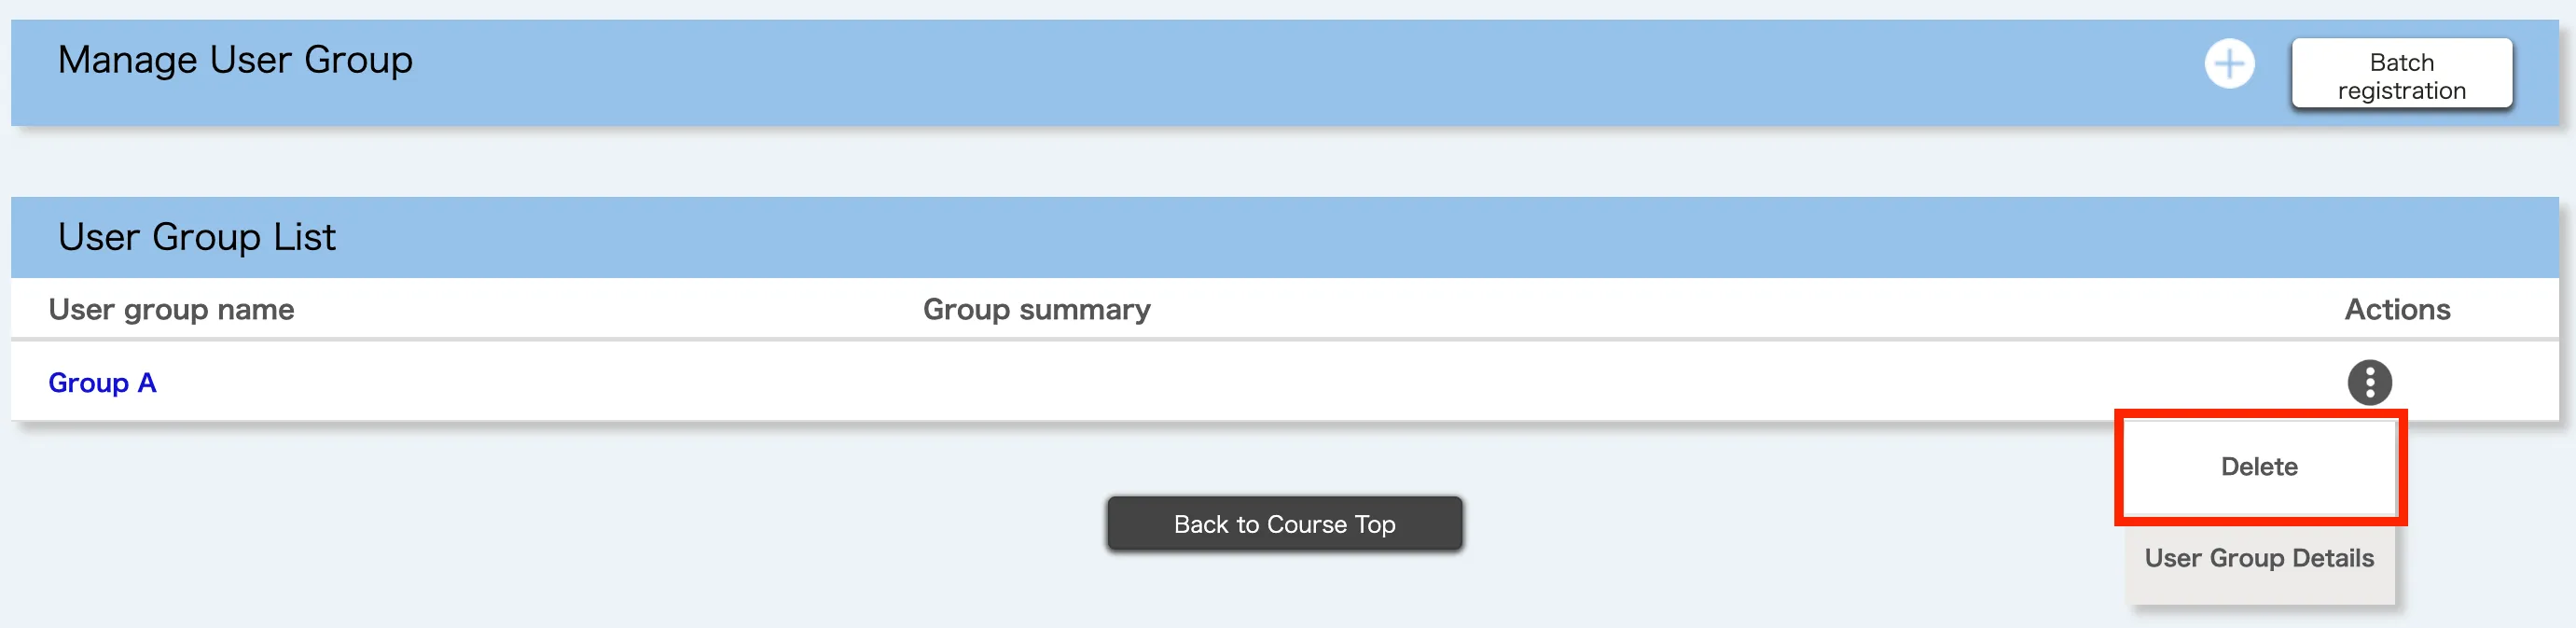
Open the “Actions” menu for the user group you want to delete in the “User Group List” and click on the” Delete” button.
-
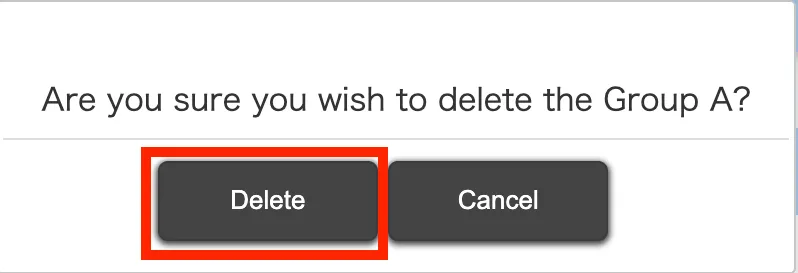
The message “Are you sure you wish to delete (user group name)?” will be displayed. Please check that the target group is correct and click the “Delete” button.
-
If the target group has been deleted from the “User Group List”, the registration process has been completed.
Publishing content only to selected user groups
This page explains the procedure for publishing content (e.g., course materials, assignments) only to selected user groups. The example here is for assignments, but the same procedure applies to other types of content.
- Open the target course.
- Click the ”+” button in the “Assignments” box to register a new assignment. To edit an existing assignment, click the assignment name you want to edit in the “Assignments” box.

- The new registration/edit assignment screen will appear. After entering and editing the other items, select the “Selected user group” in the “Published target” as shown below.

- From the “User Group List”, select all the checkboxes for the user groups of published targets. When finished, click the “Confirm” button. (Selecting the checkbox directly below the “User Group List” will allow you to select all the displayed user groups simultaneously.)

- Check the details, and if there are no problems, click on “Register” button.
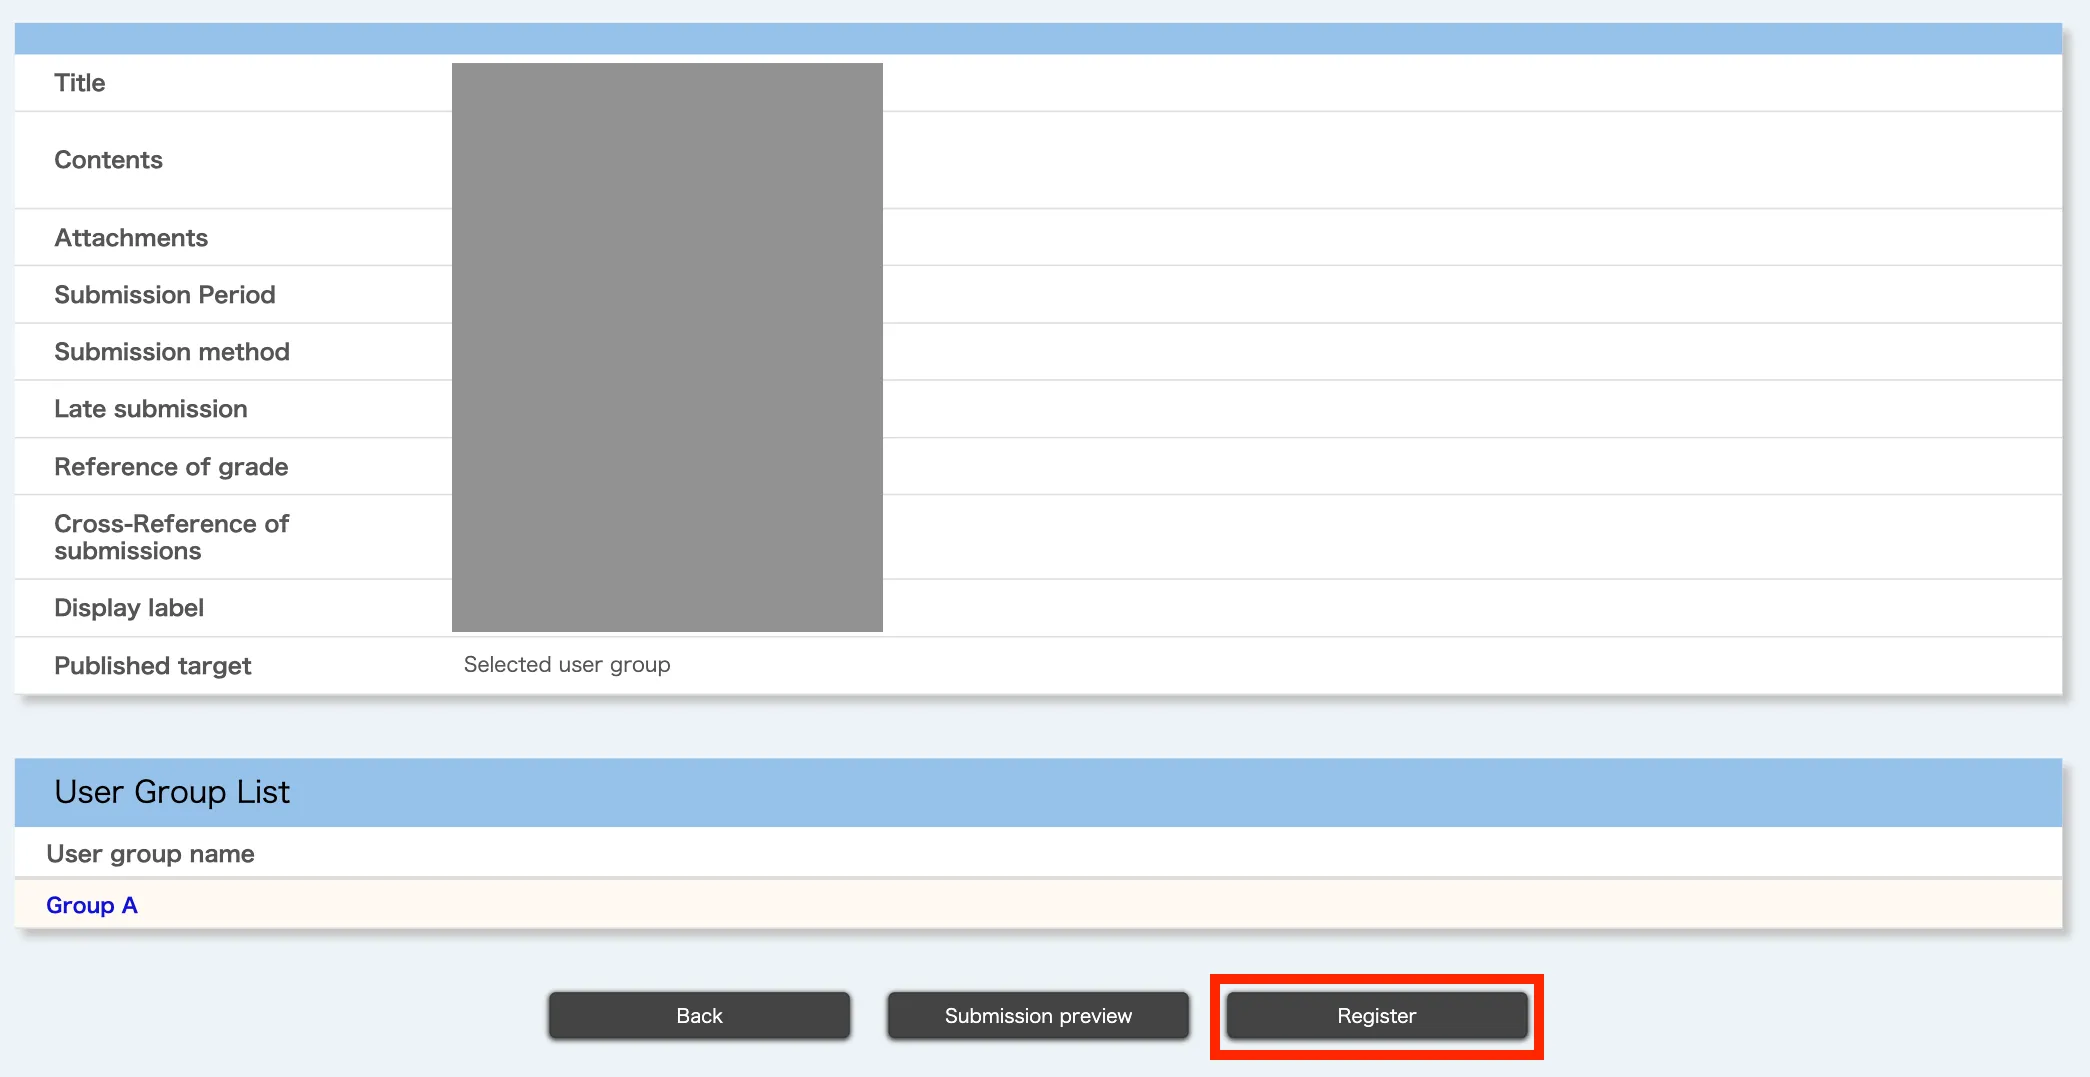
- You are done if the message “Registration is completed.” is displayed.